Rooftops That Feed You While Cutting Energy Bills
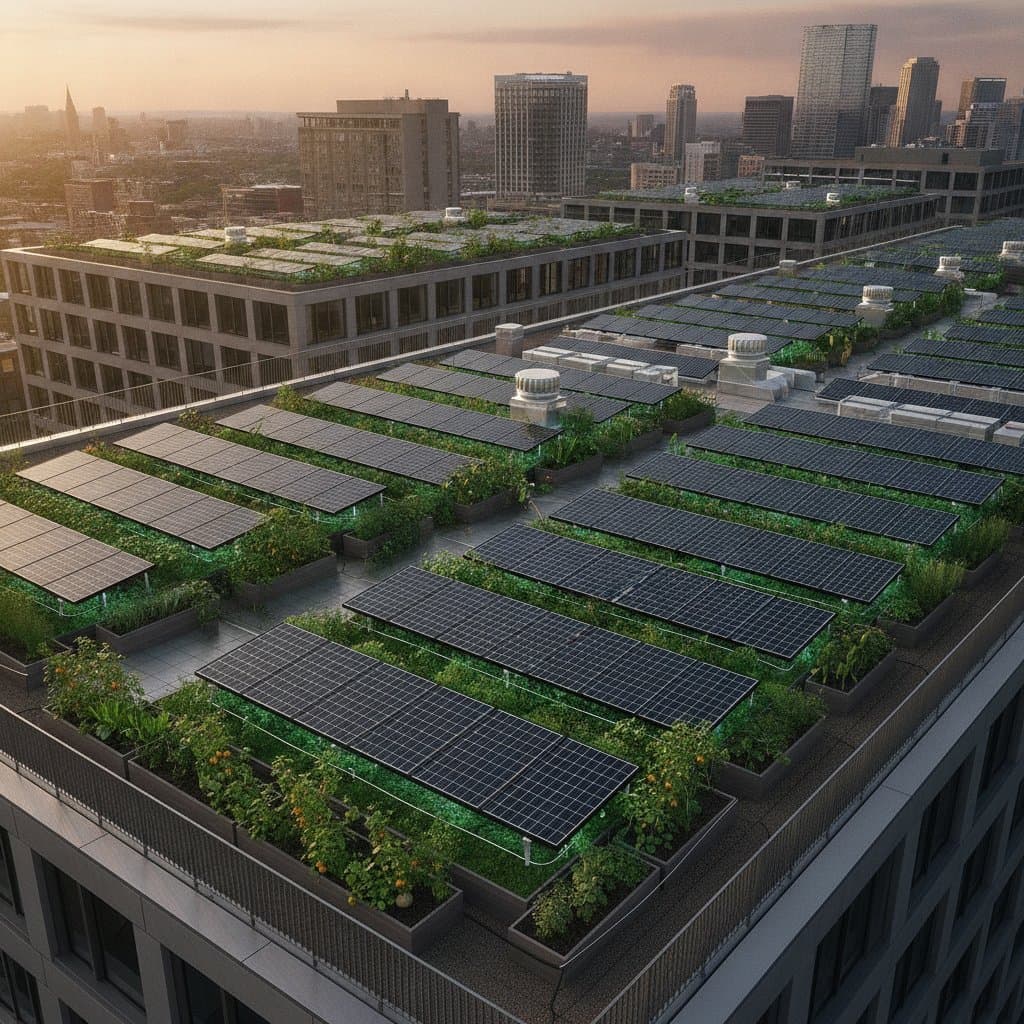
Agrivoltaic roofs combine solar panels with crop cultivation to turn unused rooftop space into productive areas. Solar panels generate electricity for the building. Panel shade shields plants from intense sun while retaining soil moisture. Plants in turn release humidity that helps regulate panel temperatures and maintain efficiency.
This integrated setup supports simultaneous food production and energy generation through careful management of light, water, and airflow.
Designing Your Agrivoltaic Roof System
Step 1: Evaluate Structural Capacity
Confirm that the roof supports the added weight of panels, soil, and irrigation equipment. Flat roofs work best, though adjustable mounts accommodate gentle slopes. Engage a structural engineer to review load limits and confirm waterproofing integrity before proceeding.
Step 2: Choose the Right Solar Setup
Install bifacial panels to capture reflected light from both surfaces and increase output. Set row spacing for at least 40 percent light transmission to the plants below. Adjustable tilt mechanisms allow seasonal control over shade levels.
Step 3: Pick Climate-Smart Crops
Select leafy greens such as spinach, lettuce, and kale that tolerate partial shade. Herbs including basil and cilantro also perform well under dappled conditions. In arid climates, peppers and beans benefit from the cooler root zonescover.
Test small trial plots first to measure local light levels, soil temperature, and yields. Adjust spacing based on observed results before scaling the full system.
Step 4: Integrate Efficient Irrigation
Use drip lines or capillary mats to deliver water precisely to root zones and reduce evaporation losses. Channel panel runoff into collection tanks for later reuse in the growing beds. This closed-loop approach lowers water costs and supports consistent plant health.
Step 5: Plan Maintenance Access
Incorporate dedicated walkways and secure railings that allow safe access for harvesting, panel cleaning, and system checks. Thoughtful layout prevents damage to crops or wiring during routine tasks.
Expert Tips to Boost Your Home’s Eco-Efficiency
- Blend lightweight growing media with compost and coconut coir to limit total roof load.
- Position reflective surfaces under plant beds to redirect light toward lower leaves.
- Border the installation with pollinator plants to encourage beneficial insects.
- Deploy simple sensors to track temperature and moisture for precise irrigation timing.
- Arrange yearly professional reviews of both electrical and structural components.
Practical Considerations Before Installation
A typical residential agrivoltaic installation costs between 25000 and 45000 dollars depending on area and equipment choices. Available rebates for solar and urban farming can recover up to 30 percent of expenses. Most systems reach payback within 8 to 12 years through lower utility bills and possible produce sales.
Permitting and design usually require several months, while physical construction takes a few weeks. Coordinate solar technicians and horticulture advisors from the outset to align waterproofing, wiring, and planting plans with local codes.
Environmental and Community Benefits
These roofs lower surrounding air temperatures, decrease stormwater runoff, and improve neighborhood food access. On a larger scale they provide visible examples of climate adaptation that encourage wider adoption.
Dr. Lena Ortiz, a sustainability researcher, noted that visible rooftop gardens under solar arrays prompt neighbors to explore similar projects and strengthen collective commitment to resilient urban design.
Next Steps for Homeowners
Begin with a site assessment by a qualified green building professional to confirm roof suitability and solar exposure. Pilot installations of 200 to 300 square feet offer practical experience before larger commitments. This measured approach delivers reliable energy savings and fresh produce while advancing sustainable building practices.