Key Points
- Thermal scans can uncover unseen energy leaks that raise your utility bills and lower comfort
- Infrared imaging identifies insulation gaps, air leaks, and hidden moisture issues
- A professional thermal imaging audit can save you up to 20 percent on heating and cooling costs
- Homeowners gain insight into where to seal, insulate, or upgrade for maximum efficiency
- Regular scans help maintain energy performance and indoor comfort over time
Seeing the Invisible: How Thermal Scans Expose Energy Waste
As a green building pro, I have seen countless homeowners puzzled by high energy bills even after sealing windows or upgrading HVAC systems. You might feel your home is energy efficient, yet those monthly costs keep rising. The truth often lies in what your eyes cannot see. Thermal imaging, a process using infrared technology, reveals the hidden leaks and insulation weak spots that quietly drain your wallet and your comfort.
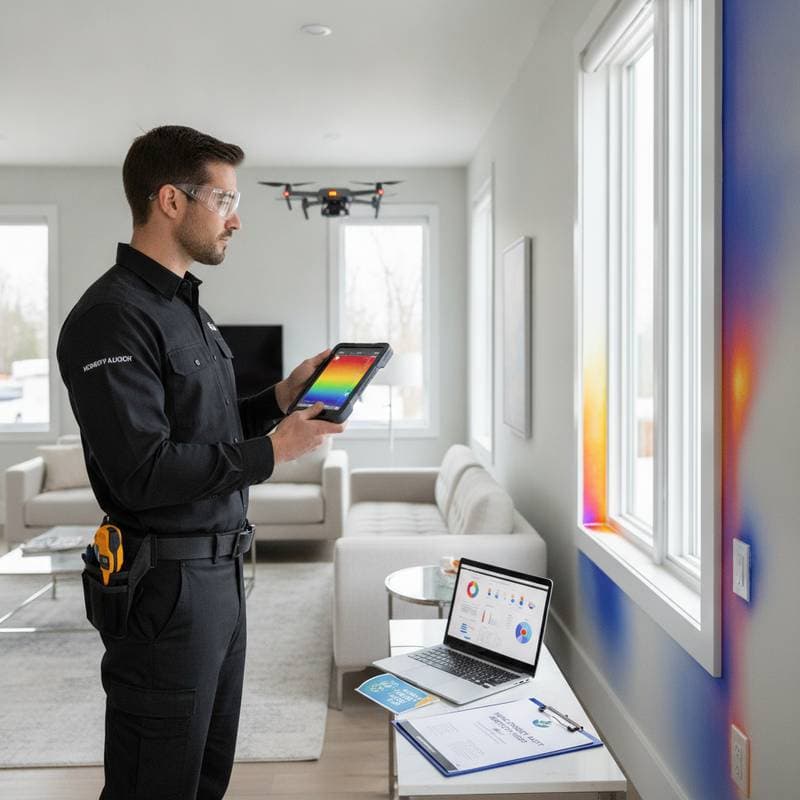
Picture this: you walk into your living room on a cool morning and notice a chilly draft despite the windows being closed. That discomfort is not a mystery; it is an unseen energy leak. With a thermal scan, bright red and yellow spots on an infrared image expose precisely where heat escapes. Once you see that visual map, improving efficiency becomes a clear, achievable goal.
The Hidden Problem Inside Your Walls
Many homes, even newer ones, hide inefficiencies that grow over time. Tiny air gaps around doors, uninsulated wall cavities, or poorly sealed ducts can waste a surprising amount of energy. Studies show that up to 30 percent of conditioned air is lost through hidden leaks. In humid regions, these gaps can also allow moisture intrusion, leading to mold growth or weakened structural materials.
From my years in the field, I have found that most homeowners underestimate how much energy loss happens through the attic and around recessed lighting. These small openings act like escape hatches for your expensive heated or cooled air. Without tools that see beyond visible surfaces, these issues remain invisible, leaving your home working harder than necessary.
What a Thermal Imaging Audit Reveals
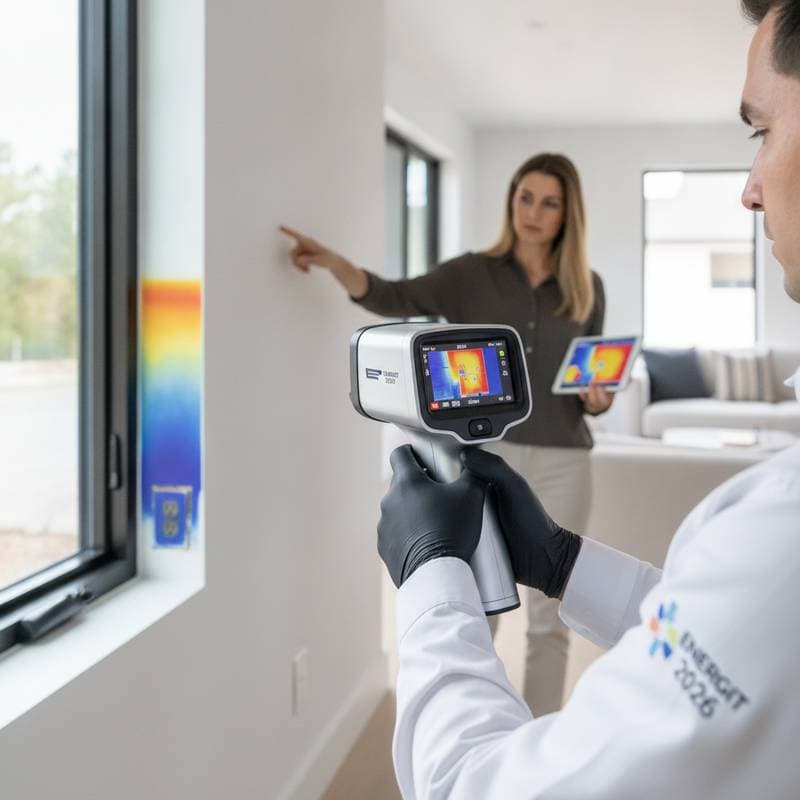
A thermal imaging audit uses infrared cameras to detect temperature variations across your home’s surfaces. Cool spots may indicate missing insulation, while warm streaks can show air infiltration or faulty seals.
During a professional scan, technicians often uncover:
- Insulation voids in walls, ceilings, and floors
- Air leaks around windows, doors, and baseboards
- Moisture build-up behind drywall or under roofing materials
- Overheating electrical components that pose safety hazards
- HVAC duct leaks that reduce system performance
Each discovery tells a story about how your home manages energy flow. By identifying these weak links, you gain a blueprint for targeted upgrades that deliver lasting savings.
Expert Steps to Maximize Your Thermal Audit Results
1. Prepare Your Home for the Scan
Close windows and doors, turn off fans, and maintain a consistent indoor temperature for several hours before the inspection. This helps highlight thermal differences between inside and outside surfaces, making leaks easier to detect.
2. Hire a Certified Professional
While handheld infrared cameras are available for rent, a certified thermographer brings expertise you cannot match with a quick DIY scan. Professionals use calibrated equipment and analyze patterns that reveal subtle issues an untrained eye might miss. A quality audit typically costs $250 to $600 and delivers actionable results.
3. Review the Thermal Report Carefully
Your technician will provide images showing temperature patterns across your home. Focus on areas with the largest temperature differences. These are your prime targets for sealing, insulating, or repairing.
4. Prioritize Improvements Strategically
Address air leaks first, then insulation gaps. Air sealing offers fast results and often pays for itself within a single season. After sealing, upgrade insulation in attics, crawl spaces, and walls for deeper efficiency gains.
5. Verify Repairs with a Follow-Up Scan
A post-repair thermal image confirms improvements and ensures no issues remain. This step validates that your investment achieved measurable efficiency gains.
Expert Tips to Boost Your Home’s Eco-Efficiency
- Seal gaps around windows and doors using weatherstripping or low-VOC caulk.
- Insulate attic hatches and recessed lighting to prevent heat loss.
- Upgrade to high-performance insulation materials like cellulose or spray foam, which offer high R-values (a measure of thermal resistance).
- Install energy-efficient windows with low-emissivity coatings to reduce heat transfer.
- Schedule a home energy audit every few years to maintain performance.
As a green building expert, I recommend pairing thermal imaging with blower door testing for the most complete picture of your home’s efficiency. Combining these methods allows you to measure actual air leakage rates and verify improvements over time.
Practical Considerations and Payoff
Energy leaks may seem trivial, but their cumulative effect is substantial. Air infiltration alone can account for hundreds of dollars in wasted energy annually. A thorough thermal audit can identify improvements that reduce those costs by 15 to 25 percent.
Material choices matter too. Sealing and insulation costs vary based on home size and condition. Expect to spend $1,000 to $3,000 for comprehensive upgrades, but the long-term savings often offset those expenses within a few years. Beyond cost, improved insulation reduces noise transfer and enhances indoor comfort throughout every season.
Safety should always come first. Moisture spots revealed through infrared imaging might indicate hidden leaks that compromise structural integrity. Never ignore these findings. Consult a professional to address them promptly before mold or rot develops.
If you plan to pursue green certifications such as LEED or Energy Star, documentation from a thermal scan supports your energy performance claims. It also provides proof for rebates and tax incentives available for verified efficiency improvements.
Making It Happen
Seeing your home through the lens of thermal imaging can be a turning point. Once you visualize those glowing patterns of heat loss, you gain control over your comfort and energy use. The key to success lies in taking the next practical step. Schedule a professional thermal imaging audit and use the results as your roadmap toward a more sustainable home.
From my years in the field, I have found that homeowners who act on their scan results experience not just lower bills but also a deeper connection to their living space. A well-sealed home feels steadier, quieter, and more in tune with the environment.
Reach out to a vetted green building expert via our platform for a no-obligation quote. You will receive guidance tailored to your region’s climate and your home’s construction type. With expert support, even small improvements can yield big comfort and sustainability gains.
Frequently Asked Questions
Q: How often should you get a thermal scan?
A: Every two to three years is ideal, or after major renovations. This timing helps ensure new materials or systems perform efficiently and that no new leaks have developed.
Q: Can I perform a thermal scan myself?
A: You can, but professional thermographers use advanced cameras that detect subtle variations a consumer device might miss. A professional assessment provides accurate data and expert interpretation.
Q: What time of year is best for a thermal imaging audit?
A: Schedule it during temperature extremes, like the hottest or coldest months in your region. Greater indoor-outdoor temperature differences produce clearer thermal images.