Key Points
- Thermal imaging identifies heat loss invisible to standard inspections.
- Professional audits detect insulation voids, air infiltration, and moisture before major issues arise.
- Scans cost $300 to $600 and yield 15-30% annual utility reductions.
- Insights from scans guide efficient upgrades and eligibility for energy incentives.
Understanding Hidden Energy Losses
Homeowners often face escalating energy bills despite recent improvements like new insulation or windows. A subtle draft on a cold evening or an overworked air conditioner on humid days signals underlying problems concealed within walls or attics.
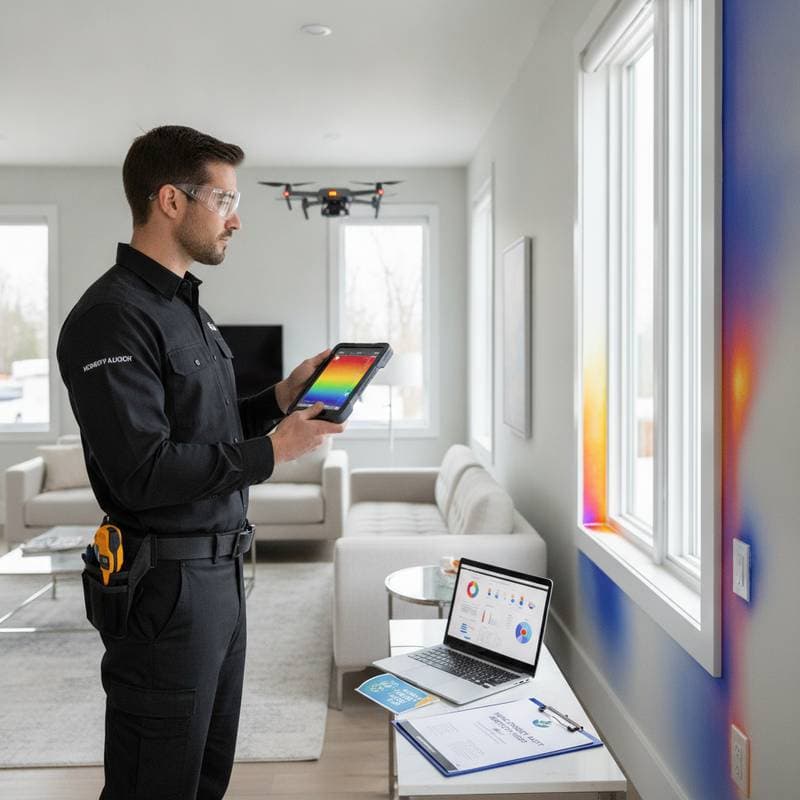
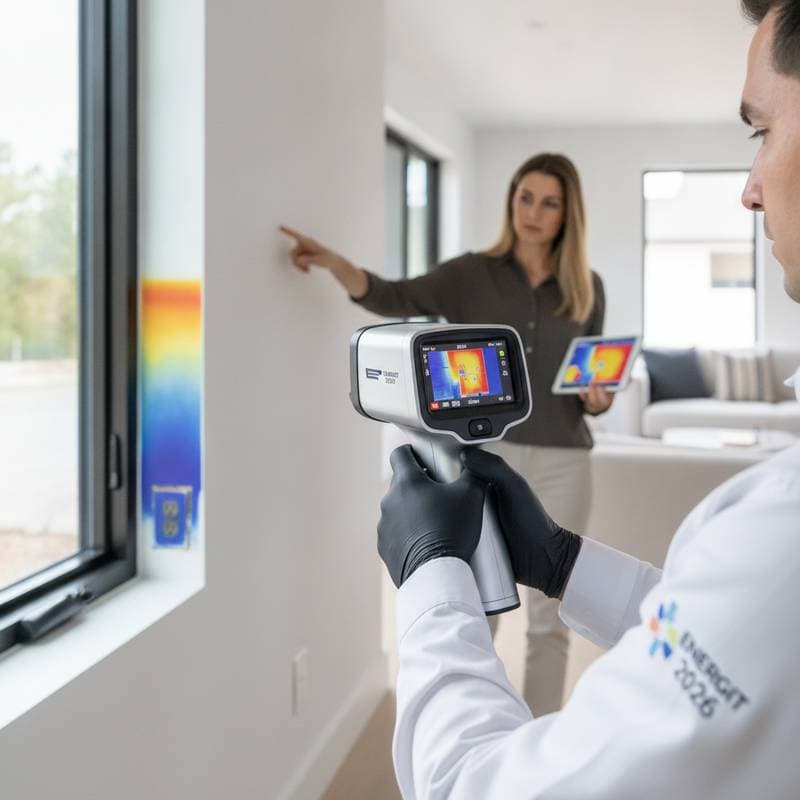
Thermal imaging provides visibility into these issues by mapping temperature differences across surfaces. The resulting color-coded images highlight escape routes for heat or entry points for unwanted air, offering a clear view of your home's performance.
This diagnostic tool shifts frustration into actionable knowledge, enhancing both comfort and financial outcomes.
The True Cost of Undetected Leaks
Small imperfections accumulate significant expenses. Gaps near recessed lights, attic access points, or unsealed ducts can increase heating and cooling demands by 20% or higher.
Beyond finances, these leaks foster condensation, risking mold and material degradation. In humid areas, trapped moisture further impairs air quality and comfort.
Field experience shows that eight in ten homes suffer from insulation inconsistencies due to settling materials or incomplete installations. Thermal scans make these defects evident, enabling precise interventions.
Principles of Thermal Imaging
Infrared cameras in thermal imaging capture surface heat signatures, rendering warmer zones in orange and yellow, cooler areas in blue and purple. These visuals disclose air movement, insulation deficiencies, and moisture presence.
Trained auditors analyze patterns to spot:
- Infiltration at window frames, vents, or light fixtures.
- Voids in wall, ceiling, or crawl space insulation.
- Thermal bridges where heat flows through structural elements.
- Evaporative cooling from hidden dampness.
Pairing scans with blower door tests quantifies total air leakage for a thorough assessment.
Steps in a Thermal Energy Audit
A typical audit unfolds as follows:
- Preparation: Secure windows, doors, and vents; aim for a 10-degree indoor-outdoor temperature gap.
- Blower Door Installation: The device creates pressure differences to amplify leak visibility.
- Scanning Phase: Auditors image interiors, attics, and exteriors, focusing on edges and transitions.
- Report Delivery: Receive detailed findings with marked images, issue ratings, and repair suggestions.
This structured approach delivers a clear plan for enhancements.
Strategies for Enhanced Efficiency
Post-scan, target vulnerabilities with these proven methods:
- Air Sealing Priorities: Apply weatherstripping and caulk to windows, doors, and outlets for immediate draft reduction.
- Insulation Improvements: Prioritize attics and walls with cellulose fill or spray foam for superior gap coverage.
- Bridging Mitigation: Install rigid exterior insulation during renovations to interrupt heat paths.
- Duct Maintenance: Seal leaks using mastic to recover up to 30% of lost conditioned air.
- Radiant Protection: Deploy attic barriers in warm climates to deflect solar heat.
These measures build a cohesive, efficient home system.
Planning Your Audit
Expect fees of $300 to $600 based on home scale and location. Utilities or programs may cover portions or provide upgrade rebates.
Optimize with these preparations:
- Time scans for extreme weather to maximize temperature contrasts.
- Skip sessions after direct sun to prevent surface distortions.
- Select certified professionals skilled in image analysis.
Many clients recover costs in one year via bill reductions, provided they implement advice.
Broader Impacts on Environment and Wallet
Efficiency lowers operational costs and emissions, easing grid demands. Each saved kilowatt-hour supports cleaner energy production and community stability.
Upgrades attract tax credits and boost property values by 5-10% for 25% energy cuts. Documented audits appeal to buyers valuing sustainability and savings.
Limits of At-Home Detection
Portable thermometers or app-based attachments offer basic checks but fall short on accuracy for comprehensive reviews. Use them for spot inspections at windows or fixtures.
For initial screening:
- Measure attic insulation levels manually.
- Detect drafts by hand on breezy days.
- Trace air currents with smoke from incense.
Professional scans provide the definitive, measurable results.
Health and Safety Implications
Leaks extend beyond economics, creating uneven temperatures and hazards. Moisture accumulation breeds mold; cold walls invite condensation damage.
Audits flag risks early, averting expensive fixes. Opt for low-emission sealants and integrate ventilation to avoid pollutant buildup in sealed spaces.
Case Studies from the Field
A coastal resident noted room temperature variances. Scans uncovered attic insulation gaps and leaky fixtures above the kitchen, leading to a 28% bill drop post-repairs and restored evenness.
In a humid suburb, wall cold spots traced to roof leaks prevented mold outbreaks, saving substantial remediation funds. Such outcomes underscore thermal imaging's role in preservation.
Next Steps for Efficiency
Address suspicions of losses promptly to curb seasonal spikes. Engage certified experts via trusted networks for audits, interpretations, and incentive navigation.
Incremental fixes accumulate benefits, fostering a home that operates sustainably and comfortably. Armed with scan data, pursue a resilient, economical space.
Frequently Asked Questions
Q: How long does a thermal imaging energy audit take?
A: Audits generally span two to three hours, varying by home size and detail level. Multi-level structures often extend the timeline for thorough coverage.